


Hi, I’m Samantha — but most people call me Meme.
I raise composting worms every day in real worm bins and production systems. I’ve also killed more worms than most beginners will ever own. That’s how I learned what actually works when you’re just starting out — and what causes people to quit before they ever see success.
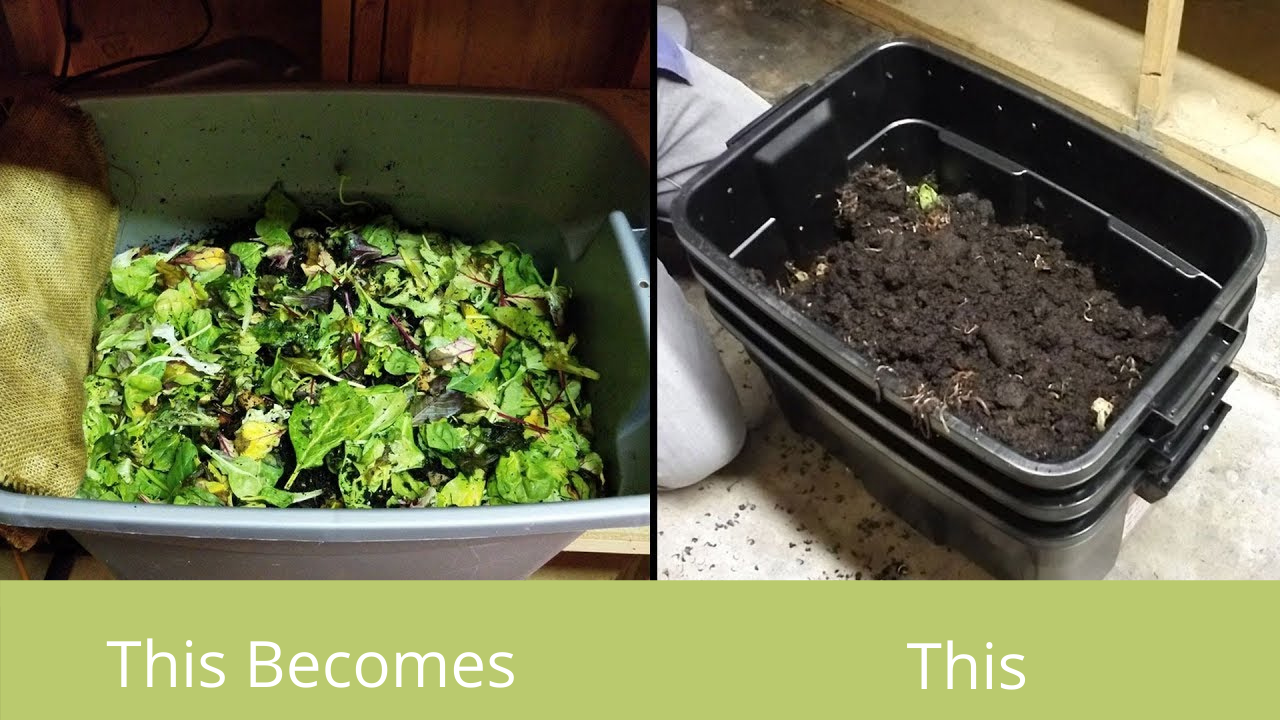
If you want to start vermicomposting without spending a lot of money, DIY worm bins are one of the best ways to begin. Whether you’re looking for a simple worm composting bin DIY setup or experimenting with a more advanced system, you don’t need fancy equipment. You don’t need a perfect setup. You just need the right basics and a little patience.
This guide will walk you through simple, inexpensive DIY worm bin options and show you how to set them up the right way from day one.
Why DIY Worm Bins Work So Well
DIY worm bins are popular for a reason. Many people choose a DIY worm composter because it’s flexible and forgiving.
They’re:
- Affordable
- Easy to build
- Customizable to your space
- Perfect for beginners
A simple bin lets you focus on learning worm behavior, moisture balance, and feeding — which matters far more than the container itself, whether you’re building a DIY compost bin with worms or a basic indoor setup.
What You Need to Start a DIY Worm Bin
Before you build anything, gather these basics for your DIY earthworm bin:
- A container (10-gallon tote or 5-gallon bucket works great)
- A drill for ventilation and drainage holes
- Bedding material (shredded cardboard, paper, or coco coir)
- Composting worms (Red Wigglers are best for bins)
- Food scraps (vegetable and fruit scraps only)
- A tray or second container (optional, for catching excess moisture)
You don’t need expensive gear. Balance matters more than tools in any worm composting bin DIY setup.
DIY Worm Bin Option #1: Tote or Bucket Bin
This is the most common and beginner-friendly option when people build their first DIY worm bins.
What to Use
-
Plastic storage tote (10–18 gallons)
or - 5-gallon bucket with lid
How to Build It
- Drill small air holes around the upper sides of the bin.
- Drill a few drainage holes in the bottom if using a tote.
- Place the bin on bricks or over a tray to catch excess liquid.
- Add damp bedding until the bin is about one-third full.
- Bury a small amount of food under the bedding.
- Add your worms and cover everything with bedding.
Your bedding should feel like a wrung-out sponge, not wet or dripping.
DIY Worm Bin Option #2: Breathable Fabric Bin
Some people prefer breathable fabric bins because they allow more airflow and help prevent moisture problems. These bins are still considered a form of DIY worm composter for beginners.
These bins:
- Reduce odor issues
- Improve airflow
- Make harvesting easier
They cost more than a tote but still fall into the “DIY-friendly” category for beginners who want fewer moisture issues.

Choosing the Right Worms for a DIY Bin
Not all worms belong in bins, especially when building DIY worm bins at home.
For DIY worm bins, I recommend Red Wigglers because they:
- Live in the top layers of bedding
- Handle mistakes better
- Reproduce quickly
- Process food efficiently
Earthworms from your yard do not do well in bins and usually die off, even in a DIY earthworm bin.
👉 Learn more here: Caring for Red Wigglers
Bedding: The Most Important Part of Your Bin
Bedding does more than hold worms — especially in a DIY compost bin with worms.
Good bedding:
- Regulates moisture
- Allows airflow
- Feeds beneficial microbes
- Prevents odors and pests
Best bedding options:
- Shredded cardboard
- Shredded newspaper (non-glossy)
- Coco coir
- A small handful of finished worm castings
👉 Bedding matters more than food: Worm Bedding: 9 Awesome Choices
Feeding Your Worms (Less Is More)
One of the biggest beginner mistakes in any worm composting bin DIY setup is feeding too much.
Follow these rules:
- Feed small amounts
- Bury food under bedding
- Wait until food is mostly gone before feeding again
- Avoid meat, dairy, oils, and salty foods
If your bin smells or attracts pests, stop feeding and add bedding.
👉 Odor troubleshooting:
Banishing Bad Smells: Your Guide to Worm Composting Bin Odors
Common DIY Worm Bin Mistakes to Avoid
Avoiding these will save you frustration when using DIY worm bins:
- Overfeeding
- Letting the bin get too wet
- Skipping bedding
- Stirring the bin too often
- Expecting fast results
Worm bins work best when left alone.
DIY Worm Bin vs Store-Bought Worm Bin
Here’s an honest comparison:
Feature | DIY Worm Bin | Store-Bought Bin
Cost | Very low | Moderate to high
Setup | Simple | Simple
Customization | High | Limited
Harvesting | Manual | Easier
Learning value | Very high | Moderate
DIY bins — including stacked systems like a DIY 3 tier worm bin — are excellent teachers.
Must Read : Worm Bin Problems: Guide to the 6 Most Common Worm Bin Problems
Final Thoughts
You don’t need a perfect bin to succeed.
You need:
- The right worms
- Proper bedding
- Balanced moisture
- Time
DIY worm bins are forgiving, affordable, and one of the best ways to learn vermicomposting the right way — whether you’re using a simple tote, a DIY earthworm bin, or experimenting with a DIY 3 tier worm bin.
I learned that by making every mistake first — so you don’t have to.
Related Reading
- https://memesworms.com/blogs/news/vermiculture-101-how-to-start-a-worm-farm-as-a-business-or-a-hobby
- https://memesworms.com/blogs/news/worm-composting-at-home
- https://memesworms.com/blogs/news/creating-a-healthy-environment-for-your-worms


Leave a comment
All comments are moderated before being published.
This site is protected by hCaptcha and the hCaptcha Privacy Policy and Terms of Service apply.