



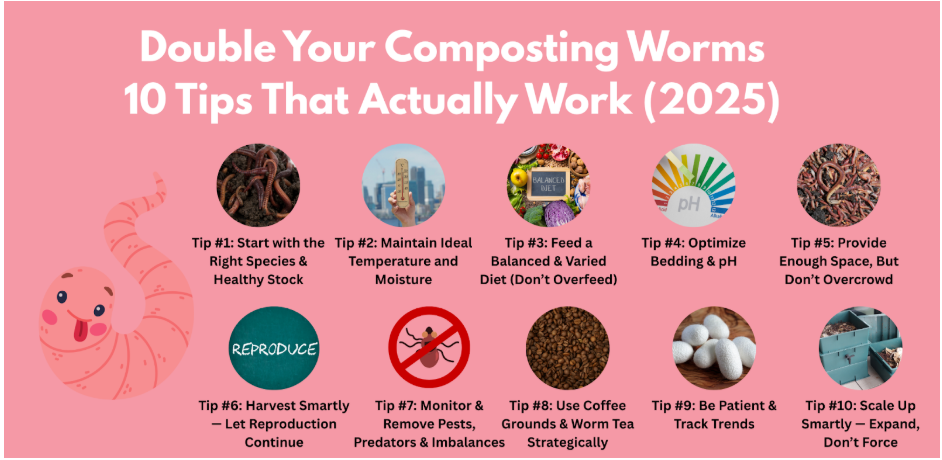
If you're running a vermicompost system or worm bin, you’ve likely wondered: Can I double my worm population? The short answer is yes — under ideal conditions, a healthy worm colony can double its numbers in 60–90 days. But it doesn’t just happen by magic. You need to give them the right environment, food, and care.
In this post, I’ll walk you through 10 proven strategies to grow your composting worm population — not gimmicks, but practical, experience-backed tips you can apply in 2025 and beyond. By following these, you can transform your worm bin into a thriving, self-sustaining ecosystem.
Why It Matters: The Value of More Worms
Before diving into the how-to, let’s get clear on why you'd want more worms:
-
More worms = faster decomposition of kitchen scraps, yard waste, and organic materials.
-
More worms = more worm castings (aka “black gold”), which are nutrient-rich, microbe-dense, and excellent for soil health.
-
A growing worm population means your system is stable and resilient — less labor for you, more benefit for your plants.
Because worm reproduction is tied to conditions, your role is to create an environment where they want to breed.

Must Read : Worm Castings vs Worm Tea: When to Use Each for Best Garden Results
Tip #1: Start with the Right Species & Healthy Stock
Not all worms are equal. For vermicomposting, you want epigeic / composting worms such as Eisenia fetida (red wigglers), Eisenia andrei, or Lumbricus rubellus. These species thrive in decaying organic material and reproduce quickly under proper conditions.
When getting your initial worms:
-
Purchase from a reputable vermiculture supplier like Memes Worms (check reviews, credentials).
-
Seek a healthy, active population, not worms that look pale, slimy, or lethargic.
-
Introduce them gently to your bin — let them acclimatize rather than dumping them into a poor environment.
A good starting ratio is about 1 lb of worms per sqft of surface area. ( that is Length x Width= sqft of your bin)
Tip #2: Maintain Ideal Temperature and Moisture
Worms are delicate. They flourish under just the right temperature and moisture range — too far off, and reproduction slows or stops.
-
Temperature: Aim for 15ºC to 25ºC (68–77 °F). Outside this range, worms may slow down reproduction or move out of bin. Keep warm with blankets or bubble wrap. In heat, shade and ensure ventilation.
When conditions are optimal, reproduction accelerates.
Tip #3: Feed a Balanced & Varied Diet (Don’t Overfeed)
Food is the fuel for reproduction — but too much or the wrong mix can be harmful.
-
Provide a mix of “greens” (nitrogen-rich scraps: fruit/veg peelings, coffee grounds) and “browns” (carbon-rich: shredded paper, cardboard, dried leaves).
-
Avoid or limit citrus, onions, garlic, Do NOT feed meat, dairy, oily foods, or anything too acidic or salty.
-
Don’t overfeed. Excess, uneaten food rots anaerobically, producing harmful gases and driving worms away. Feed in moderation.
-
Gradually increase feed as the worm population grows.
A steady, varied diet supports reproduction and the health of hatchlings.
Tip #4: Optimize Bedding & pH
Bedding is your worm “home base.” If it’s compacted, acidic, or inhospitable, worms won’t reproduce well.
-
Use shredded paper, cardboard, coconut coir, aged compost, or leaf litter.
- Keep the pH near neutral (around 6.5–7). If bedding becomes acidic (due to food scraps), you can buffer it with a light dusting of oyster shell flour or crushed eggshells.
-
Fluff the bedding regularly to maintain aeration and prevent compaction. No more than once a week.
-
Add grit (oystershell flour or crushed eggshell) to help worms grind food internally.
Well-conditioned bedding encourages cocoons and hatchlings to survive.
Tip #5: Provide Enough Space, But Don’t Overcrowd
Worms are social, but overcrowding stifles reproduction. They need room, food, and oxygen.
-
Start with enough space per worm. One sqft per lb of worms..
-
As population increases, be ready to split or expand your bin system.
-
Use multi-tray worm bins or vertical stack systems to allow worms to move and expand upward.
-
Monitor for signs of stress or escape — if many worms try to climb out, it may signal overcrowding or unfavorable conditions.
By giving your worms breathing room, you avoid reproduction bottlenecks.
Tip #6: Harvest Smartly — Let Reproduction Continue
Harvesting castings is part of the fun — but if you remove too many worms or cocoons, you suppress population growth.
-
Use a divide-and-harvest method: separate part of the bin and leave a portion with worms and food to keep breeding.
-
Or use the pyramid method, letting worms migrate down while you scoop the top layer.
-
Be careful not to disturb cocoons or juveniles. Any you see add to a grow out area.
-
Harvest in stages — don’t strip the bin bare.
This keeps reproduction steady even as you collect castings.
Tip #7: Monitor & Remove Pests, Predators & Imbalances
A healthy bin still needs vigilance. Predators, pests, and microbial imbalances can decimate your worm colony.
-
Ants, mites, flies: Keep bins covered, prevent excess moisture, and monitor for pest build-up.
-
Mold / fungal overgrowth: This is often a sign of too much moisture or too acidic environment. Reduce wetness, improve ventilation, and add dry bedding.
- Odor / anaerobic smell: This indicates overfeeding or lack of aeration. Remove excess food, fluff bedding, and reduce moisture.
-
Periodically inspect for any invaders and act early.
A stable, clean ecosystem supports reproduction rather than suppressing it.
Tip #8: Use Coffee Grounds & Worm Tea Strategically
Some vermiculture enthusiasts swear by coffee grounds and worm tea (liquid extracted from worm bins) to stimulate reproduction — when used carefully.
-
Coffee grounds: Mild amounts (well-mixed into bedding) act as a nitrogen boost and help maintain moisture. But too much acidic coffee can harm worms, so use cautiously.
-
Worm tea: You can feed diluted worm tea back into the bedding (not too strong) to reintroduce beneficial microbes that support worm digestion and health.
These supplements, used in moderation, can help nudge your worm population upward.
Tip #9: Be Patient & Track Trends — Expect 60–90 Day Doubling
Even under perfect conditions, doubling doesn’t happen overnight.
-
Realistic benchmarks: many bins can double within 60 to 90 days under optimal conditions.
-
In early weeks (0–2), the worms settle in. Cocoon production often shows up in weeks 3–6. Juveniles become visible around day 22.
-
Keep a log: temperature, moisture, feed amounts, observed cocoons, and juvenile count. Consistent tracking helps you catch problems before they derail reproduction.
Doubling is a goal, not a guarantee — but many successful vermicomposters report achieving this with discipline and attention.
Must Read : What To Feed Worms in 2025: The Complete Guide
Tip #10: Scale Up Smartly — Expand, Don’t Force
Once your bin is healthy and reproduction is consistent, scale wisely.
-
Add trays or modules: Stack bins vertically so worms can migrate naturally.
-
Branch out with multiple bins: This diversifies the risk (if one bin fails, others survive).
-
Introduce new food sources or seasonal waste: Expand the types of compost inputs (e.g. garden prunings, leaf litter) to feed more worms.
-
Reinvest part of your harvest: Use some of your castings or worms to seed new bins or share with neighbors — spreading the ecosystem.
By scaling, you give your growing worm population space and resources without stressing them.

Common Pitfalls & How to Avoid Them
|
Problem |
Possible Cause |
Solution |
|
Worms trying to escape |
Overheating, too wet, overcrowding, acidity |
Check conditions, reduce moisture, improve ventilation, expand bin |
|
No visible cocoons or juveniles |
Too cold/hot, compacted bedding, poor diet |
Adjust temp, fluff bedding, improve diet variety |
|
Foul odor |
Overfeeding, waterlogged, anaerobic pockets |
Remove excess food, fluff bedding, reduce moisture |
|
Pest infestations (ants, mites) |
Poor bin hygiene, excess moisture |
Cover bin, manage moisture, inspect & remove invaders early |
If you spot any warning signs, act quickly — the earlier you intervene, the better.
Wrapping Up: From Worm Starter to Worm Empire
Doubling your composting worms is absolutely possible — but only with consistent care, patience, and the right environment. The 10 tips above encapsulate what experienced vermicomposters rely on: species choice, temperature and moisture control, balanced feeding, smart harvesting, and careful monitoring.
When you achieve a thriving worm population, you unlock a composter that works for you — turning your kitchen scraps into nutrient-rich castings while your worm army quietly multiplies underneath. In 2025, with climate considerations and organic gardening increasingly popular, your worm farm can be a powerful sustainability tool.
If you apply these principles diligently over weeks and months, you’ll see your worm colony bloom — and your composting efficiency soar.
Further Reading & Sources:
Here are some of the key resources and expert guides used to inform this post:
- “Raising Earthworms (Eisenia fetida)”, NC State Cooperative Extension NC State Extension
- Florida Gardenista — Sustaining a Worm Bin Florida Gardenista
- GrowVeg on boosting worm populations and soil coverage growveg.com
- Gardening Know How — Attracting Earthworms Gardening Know How
- Red Worm Composting — on reproduction limits and realistic growth redwormcomposting.com





Leave a comment
All comments are moderated before being published.
This site is protected by hCaptcha and the hCaptcha Privacy Policy and Terms of Service apply.